Thursday, September 27, 2012

Review: Loreal Carbon Black Voluminous Mascara

I am really obsessed with mascaras (and all other make up stuffs as well) for past few months and have been trying out new products. Loreal Carbon Black Voluminous Mascara was one of my experimental try outs!


Bought it from Shoppers Drugmart, Toronto, and was around 9 to 10 Canadian Dollars. Forgot the price, as I bought loads of stuffs along with this one :/

This is a budget friendly mascara and I love budget friendly mascaras as you can't use a mascara for too long and spending a huge amount just for 3-5months doesn't make any sense to me! Well, that doesn't mean I won't be trying out any high end mascaras :P

The packaging is slick and travel friendly. The wand is pretty good and delivers product even in the inner most lashes. 


This mascara is wet in texture. It is indeed very black, so if you love your lashes to look very black, you can give it a try ;) but the formula is runny so it takes a good amount of time to dry.

If you have naturally thicker lashes only one coat will be enough. But my lashes are thin and have length but no volume. I have to apply two coats at least and after two coats it becomes clumpy. You have to be very careful and invest some time when you apply this mascara. Also the added misery is that a hell loads of product comes out on the wand, so every time I have to wipe off the extra and then apply it, otherwise its way to clumpy.


Not quite satisfied with it, but still I love this mascara. What I do is, I apply two coats of Covergirl Lashblast Volume Mascara, and then I apply one light coat of this one to add extra depth, color and shine to my lashes. I hardly wear this mascara alone. 

The wear of the mascara is quite satisfactory to me, as I don't put mascara on my lower lashes (too thin nd fine for the mascara wands to catch any lash) so can't really tell you if it smudges. But for upper lashes I didn't face any smudging and I can wear it happily for 5-6hours.

Yes, I would be repurchasing this again for the color and shine it adds to my lashes. 

Did you use Loreal Carbon Black Voluminous Mascara? Share your opinions with me!

Love and Respect,
Eeshita.

Friday, September 21, 2012

Review: Loreal Carbon Black 16HR Infallible Never Fail Eyeliner

Today I will be reviewing Loreal Carbon Black 16HR Infallible Never Fail Eyeliner, quite a long name!


I bought this from Shoppers Drug Mart, Toronto, Canada and unfortunately I forgot the price. But I believe it won't exceed CA$ 12, excluding tax.

This is an awesome budget friendly eyeliner! I have super oily skin but somehow my eyeliner stays put unless I smudge it with my fingers, which I do often. I grabbed this one on a quick notice as my previous eyeliner pencil ran out. And I am happy that I got this one :)

Its a mechanical eyeliner, which comes with a sharpner and a silicone smudger, though I hardly use the sharpner and the smudger. I find the smudger a bit hard and might be a problem for those with sensitive eyes.


It applies smoothly and glides on really well. The color is carbon black, so it is black but may be not as black as Urban Decay's Perversion.

I never wore this one for 16hours honestly, but I didn't find it to crease upto 8hours which is my highest record of wearing eyeliner.

What I love to do with this one is, I dip this one into gel eyeliners, like MAC Blacktrack Fluidline, Smashbox Caviar, Maybelline Gel Eyeliner. Specially when I dip in MAC's Fluidline I get very black application which I absolutely love! 


You can see an example how smudge-proof it is. The first line is freshly applied eye liner. Second one, I smudged twice with my fingers, third one 4 times, and fourth one 6times. 


If you have tremendous oily eyelids and if your eyeliner fades and smudges very fast, then you might need to try something else. As one of my cousins tried this one and she was quite disappointed as this faded within 3hours of application. But when dipped into MAC Fluidline, she got a wear of almost 8hours.

Yes I would repurchase it again. Because this is budget friendly, applies smoothly and has a good color pay off, and for my eyes, it stays put upto my satisfaction.

Did you ever try this? Share your opinions!

Love and respect,
Eeshita.

Tuesday, September 4, 2012

MAC Lipstick: Capricious, swatch and review!

I always stayed away from plum lipsticks as I had a preconceived min set up for plum lipsticks to be too dark and bold for me to carry out! Well, Capricious proved me wrong!


I bought this lipstick from Priyo, a supershop in Dhaka, Bangladesh and paid 1750BDT for my Capricious.

Capricious belongs to the Lustre family of MAC Lipsticks which means it has a demi-sheer wet look finish and MAC describes it as "Fanciful Rose Plum".


 For me it is a rosy plum and it has a very subtle gold shimmer to it, though I don't know if you will be able to detect the shimmer in the photos. The plum itself has a cool tone to it, but again the golden shimmer adds enough warmth to the color which makes it wearable for both cool and warm toned people.


Capricious, I believe is a very pretty plum shade which doesn't overwhelm the look. It isn't an as usual dark plum shade, but still adds a pop of color to my face without making it too dark. I absolutely love it as my go to shade and I have been wearing it a lot lately. Here are the swatches on my wrists, the left one was taken using camera flash, the right one is without camera flash :) I have also included a swatch on my lips :) :)


It has MAC's signature vanilla fragrance which helps me to bite my lips more than usual :/

The Lustre finish of this lipstick doesn't make me feel to be very moisturizing on my lips, but again, I have extremely dry lips. The color pay off is not as opaque as matte or amplified creme finish, its kind of semi opaque and I can see the pigmentation of my lips after I apply only one layer. To get a nearly opaque finish, I apply it twice or thrice at times.


Regarding the wear of lipstick, if I don't bite my lips a lot I get a wear of two to two and a half hours before it starts fading. The color is so subtle and light on my skin that it almost disappears once it starts fading. So I always have to reapply it after 2hours to keep it alive. But still, it doesn't annoy me or make it less favorite. I love it more than Cosmo and I always carry it in my purse these days.

If you are looking to add a hint of color to your face, you can grab Capricious without any doubt!

I absolutely adore the lipstick and am definitely going to repurchase as soon as I run out of my tube.

meeeee! wearing MAC Capricious :D

Did you use Capricious? Let me know your opinion!

Best regards and love,
Eeshita.


Monday, August 27, 2012

MAC Fix+ review: what should I write about it? :s

Right now I am in a great dilemma, what should I write about MAC Fix+? A product so highly raved both by beauty gurus and by common people, I don't understand my feelings for this product! Not at all......!!!

What MAC says about it:
"An aqua spritz of vitamin and minerals, infused with a calm-the-skin blend of green tea, chamomile, cucumber, topeed off with the fresh, natural, energizing scent of Sugi. Adds radiance, finishes make up. Spray it on. Skin drinks it up."


I used a 30ml of bottle of Fix+ before I bought the 100ml one, but wait, don't think that I am madly in love with this product. Read my full review first!

The 100ml bottle was CA $24 when I bought, and the 30ml one was CA $12.

Ok, I used MAC Fix+ daily, it was my go to makeup product when I was in Toronto. My skin is super oily when I am in my country, with this extreme hot humid weather, but in Toronto, my skin was JUST perfectly ok, so I used Fix+ instead of any moisturizer before my makeup. I used to spray it on my skin before I applied my primer and foundation, then I would spray 2 more spritz after I have applied my foundation, and used to admire every bit of my skin and my glowing skin! LOVED it, when I was in Toronto. So I ran out of my 30ml bottle very fast (I shared that bottle with my sister too).


As I loved this product like I can't live without it, I bought the full sized bottle before I returned to my country, and now I regret the buying. Shocked, eh?

Here's my reason why I don't love it as much I used to. This product is NOT appropriate for my skin when I am here in Bangladesh. It does NOTHING to my skin, I used it just like I used it in Toronto, and the result is a complete disaster! My makeup started melting and moving within NO time, and my face was just like an oily Paratha in less than an hour! It does NO magic here in my country like it did in Toronto, so I have almost stopped using it, except when I am too lazy to apply any foundation; I spray Fix+ on my brush and apply MAC MSFN with it, and that way I get a very very dramatic result. So yes, I am using Fix+ in Bangladesh just to get a good coverage with the MAC MSFN without using any foundation. And this way I do get a wear of about 2hours without blotting my face, and it also prevents oxidization. You can see that I haven't used much of this product and it's been 3months since I bought it :(


**Note that, I never used Fix+ after I have powdered my face, as spraying Fix+ after powdering always resulted in blotchy finish :s

I am a bit disappointed with the packaging too, specially after I have used Urban Decay's Makeup Setting Sprays. It doesn't spray as good as UD, the spritz are kind of concentrated on an area, no matter even if I spray it 8-10inches away from my face.

I really feel bad to write so many disappointing words on a product loved by so many, but hey! its not that disappointing!!! I have kept my Fix+ so that I can use it when I will be visiting a cold dry place like Toronto, specially in the fall/spring/winter. Honestly, for summer I would avoid this one.

One thing I can say is that, this will be a very good product for those who have dry flaky skin and for those whose foundation doesn't seem to cling to the skin. Doesn't matter where you are living, if you are a dry skinned girl, if you have flaky skin, go for Fix+. I promise you will NOT be disappointed and will love every bit of the product!

The price is good for the size, I must say :)

Am I going to repurchase it? If I continue living in Bangladesh, then probably not. And if I plan to visit some other places with cold dry weather specially in fall/winter/spring, I am going to use it as my go to product like I did when I was in Toronto.

A great product for dry skin, but for oily skin, its good in the cold dry days, but in summer days it can be disaster most of the times.

Did you use MAC Fix+? have any opinion? Share with me please!

Much love and respect,
Eeshita.

Tuesday, August 7, 2012

A Little Something I have tried: Red with a Twist! ;)

I had a party to attend and was planning on to do a pin up look, then I suddenly realized its been long since I posted a new look for my girls. So thought to do something interesting and colorful, instead of the pin up look, and this is where I have reached! As you can guess, I was obviously late for the party, as I had to do a step by step pictorial.... :P
Enjoy!!!!!

Step 1:
Prime your lid at first. I have used Urban Decay Primer Potion in Original.

Step 2:
Start with applying NYX Jumbo Pencil in Milk on the inner half of your lid. Then blend it with a brush or finger. I have used my finger.


Step 3:
Apply NYX Jumbo Pencil in Black Bean on the outer corner of your lid.


Step 4:
Apply NYX Jumbo Pencil in Dark Brown beside the Black Bean and blend them together.


Step 5:
Apply A red eye shadow on inner one third where you have applied NYX Jumbo pencil in Milk. I have used shade number 109 from Bh Cosmetics 120 Eye shadow palette (please check my BH Cosmetics Palette review here for the reference to the numbering), with MAC 239.


Step 6:
Apply a little bit darker eye shadow than the red one you have used before. where you have applied NYX Jumbo pencil in Black Bean and Dark Brown. I have used shade number 107 from Bh Cosmetics 120 Eye shadow palette (please check my BH Cosmetics Palette review here for the reference to the numbering), with MAC 239.


Step 7:
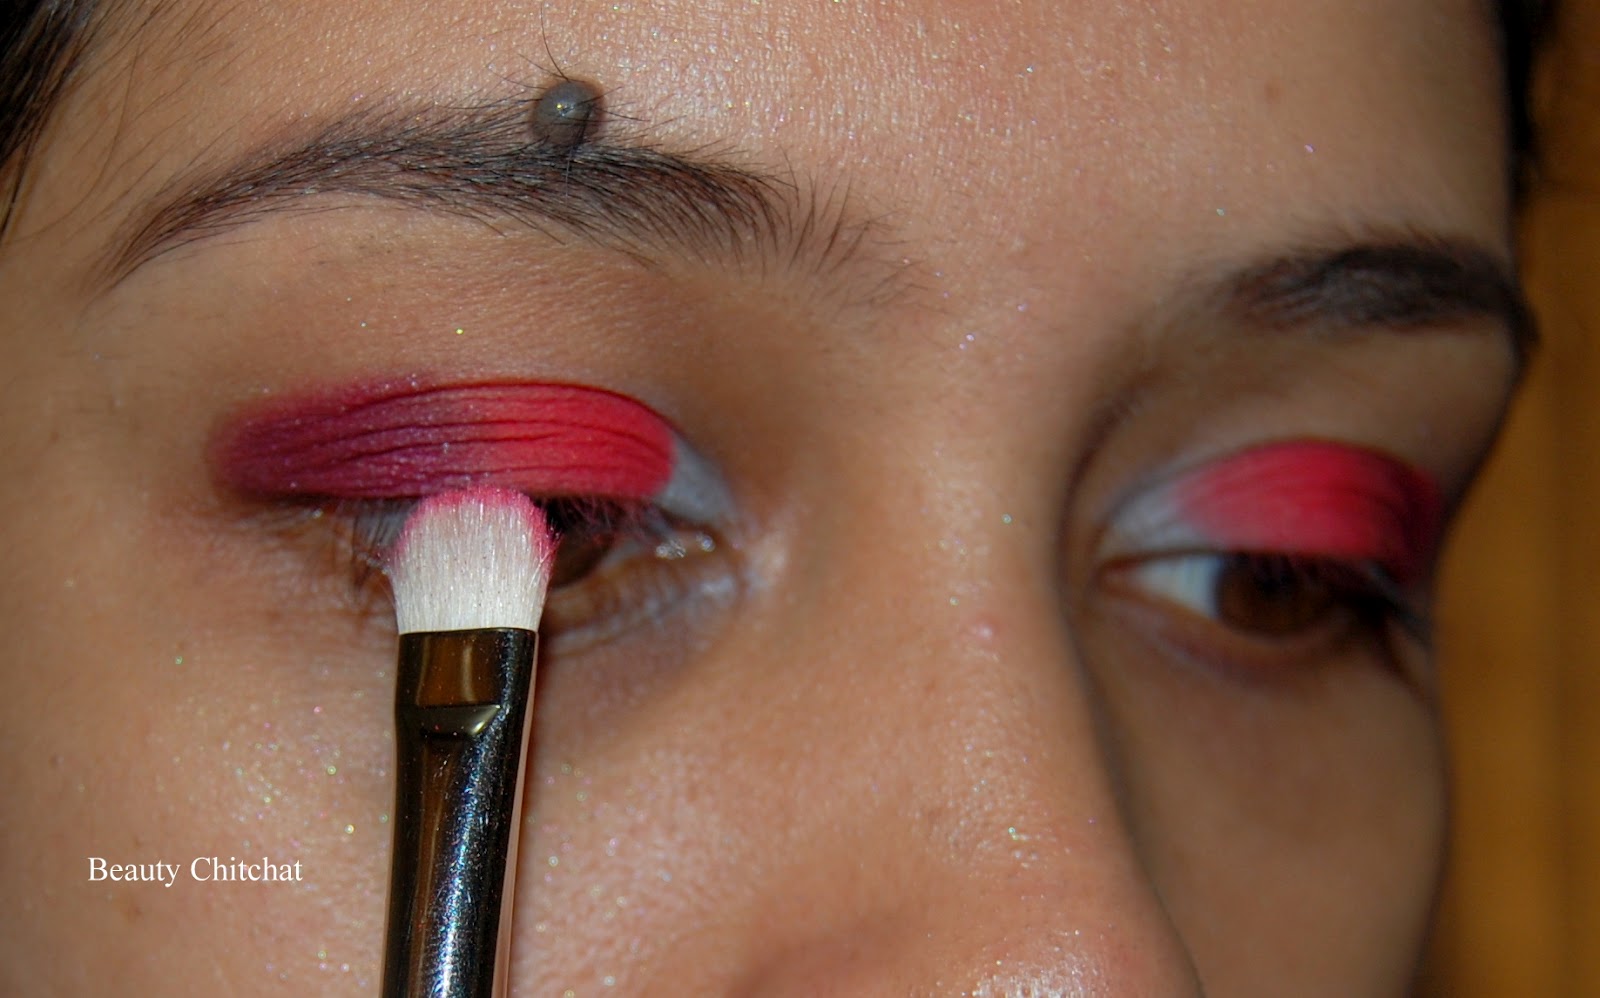
Taking a deep plum-burgundy eye shadow on the tip of the eye shadow brush or with an angled brush, apply to the outer V of the lid and fill in the V with that color.


Step 8:
Its time to blend blend blend! I have used MAC 217 blending brush.


Step 9:
Take an orange eye shadow and start blending the color on the crease. I have used shade number 54 from Bh Cosmetics 120 Eye shadow palette, with MAC 217.


Step 10:
Taking a little bit of golden eyeshadow on the tip of your blending brush, apply it over the orange color you have placed before on your crease. This will add an extra hit to the orange. I have used Smashbox Ambient with the help of MAC 217.


Step 11:
Go back and re apply the red and the plum-burgundy color so that they stand out a bit. Don't forget the blending!


Step 12:
Apply a golden eyeshadow on the inner most corner of the eye, around the tear duct. Blend properly. I have used Smashbox Ambient.


Step 13:
Apply the plum burgundy color on your lower lash line with help of an angled or a pencil brush.


Step 14:
Now this step is totally optional. You can put a little black eye shadow on the outer V of your lid. I have used Smashbox Blackout just to add some depth to other colors.


Step 15:
Tightline your upper and lower water line with an eye pencil. I have used l'oreal 16hr infalliable carbon black eye pencil.


Step 16:
Highlight your brow bone.


Step 17:
Apply eyeliner on your upper lash line. I have used MAC Blacktrack Fluidline. Apply good coats of mascara I have used Covergirl Lash Blast Volume Mascara.

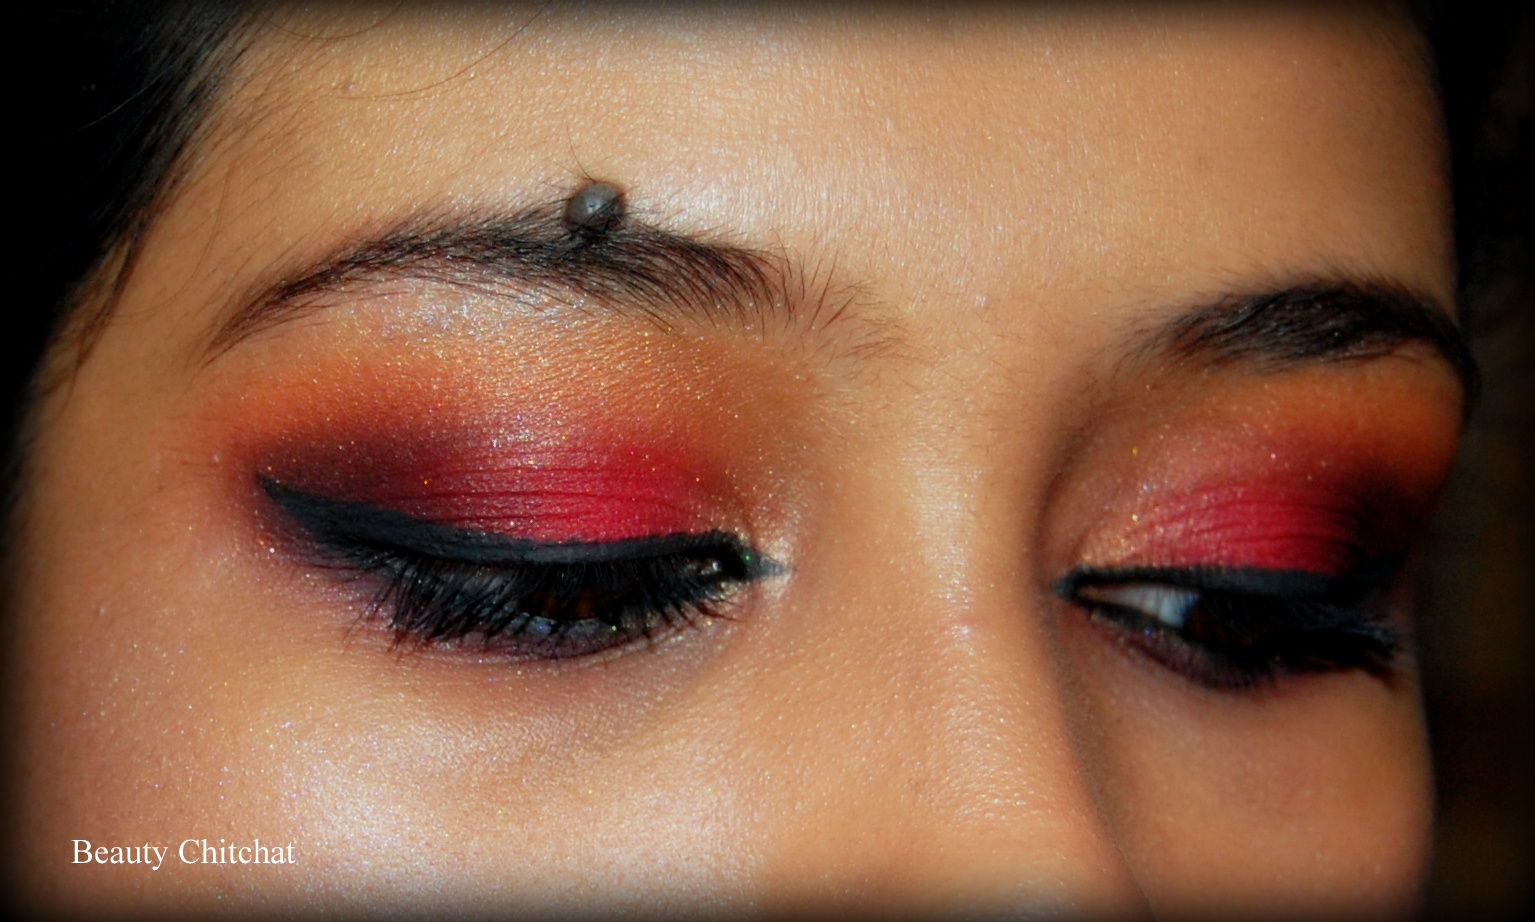
You are done! Here's the complete look:


For face~
*Urban Decay De Slick Oil COntrol Spray
*Bare Escentuals Prime Time Foundation Primer
*MAC Prep+Prime Skin Base Visage
*MAC Mineralize SPF 15 Foundation
*NARS Sheer Glow Foundation
*MAC Studio Sculpt Concealer
*MAC Mineralize Skin Finish Natural
*Smashbox Softlights in Lens and Shimmer to highlight my cheekbone
*Estee Lauder blush in Rose wood

For Lips~
*MAC Prep+Prime Lip
*NYX Mega Shine Lipgloss in Gold Pink

Let me know your opinions about the look!

Love and respect,
Eeshita.

Monday, July 23, 2012

A little something I have tried: First Attempt with colors! :D

This look was requested by one of my sister, though the one she asked me to do was far different from the one I have done here. I hope she likes it. And I have done the pictorial for her too :)

Step 1:
Prime your lid at first. I have used Urban Decay Primer Potion in Original.

Step 2:
Start with applying NYX Zumbo Pencil in milk on your lid. Then blend it with a brush or finger. I have used my finger.


 Step 3:
Apply A red eye shadow on the outer V. I have used shade number 109 from Bh Cosmetics 120 Eye shadow palette (please check my BH Cosmetics Palette review here for the reference to the numbering), with MAC 239.


 Step 4:
Fill the outer V slightly with the same shadow and an eye shadow brush, I have used the previous red shade with MAC 239.


 Step 5:
Blend the color well, with a blending brush. I have used MAC 217. Blend upto the two third of your eye crease, leaving one third that is the inner corner untouched.


Step 6:
With the help of an angle brush or any brush you are comfortable with, use a shade lighter than the previous red on the inner blank corner. I have used shade number 110 from Bh Cosmetics 120 Eye shadow palette (please check my BH Cosmetics Palette review here for the reference to the numbering), with MAC 239. Blend the colors with a blending brush, I have used MAC 217.


 Step 7:
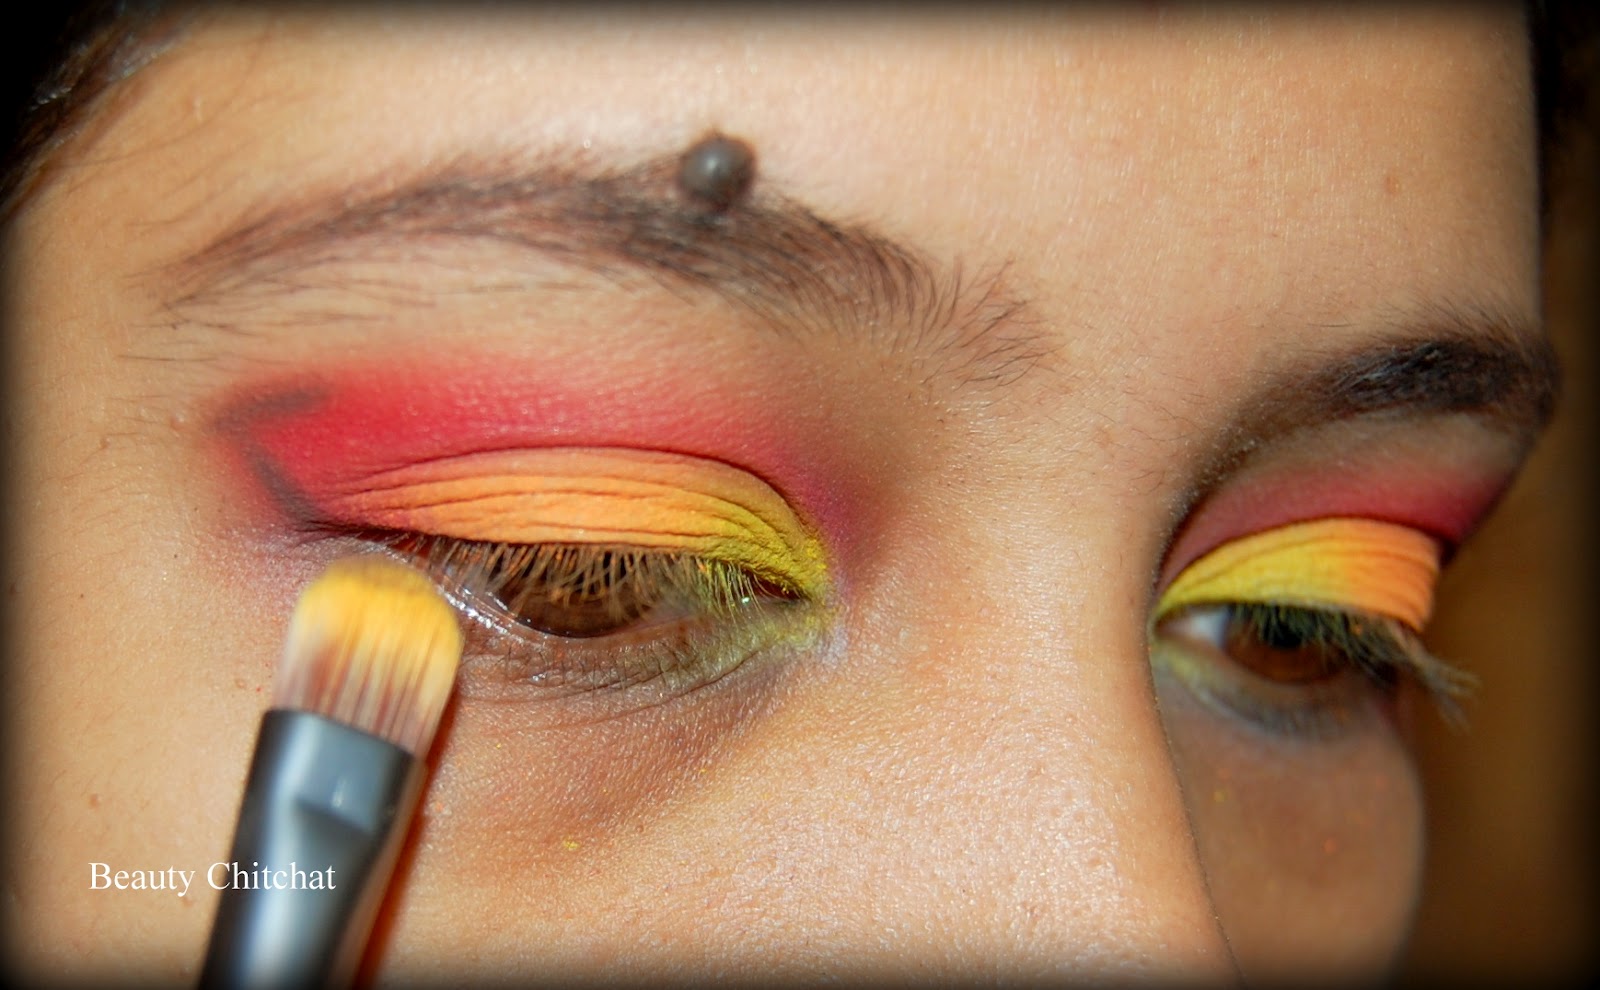
Now taking a bit stiffer shadow brush, apply an yellow eye shadow on the inner one third of your eye lid. If your eyeshadow isn't enough pigmented and tends to fall out a lot, just try to push/pack the color gently. Avoid sweeping motion, sweeping won't allow you to get a good color pay off. I have followed the same way, and applied shade number 44 from Bh Cosmetics 120 Eye shadow palette (please check my BH Cosmetics Palette review here for the reference to the numbering), with urban Decay Shadow Karma Brush.


Step 8:
using a stiffer brush again and following the push/pack method, apply an orange-ish color on the remaining part of the lid. I have used shade number 54 from Bh Cosmetics 120 Eye shadow palette (please check my BH Cosmetics Palette review here for the reference to the numbering), with with Urban Decay Shadow Karma Brush.


Step 9:
Blend all the colors with a very light hand, using a blending brush. I have used MAC 217 here.


Step 10:

with the help of an angle brush or any brush you are comfortable with, make a V with a deep dark brown, on your outer V. I have used Smashbox Java with urban Decay shadow Karma brush. Blend the brown into the red very well, with a blending brush like MAC 217. you can skip applying this brown shadow, I did this step as only the red-orange-yellow weren't very much appealing on my skin tone :(


Step 11:
With a large Shadow brush apply a matte highlighter on your browbone. I have used Smashbox Vanilla.


Step12:
Tightline your upper water line with a black eye pencil. I have used l'oreal 16hr infalliable carbon black eye pencil. Apply a thin layer of eyeliner on the lower lash line and also apply eyeliner on your upper lash line. I have used MAC Blacktrack Fluidline.


Step 13:
using an angled brush, apply a purple eyeshadow on your lower lash line. I have used shade number 85 and 87 from Bh Cosmetics 120 Eye shadow palette (please check my BH Cosmetics Palette review for the reference to the numbering), with MAC 266.


Step14:
Apply some good coats of mascara. I have used Covergirl and L'oreal Mascara and you are done! :)

Here is the finished look! I haven't done anything with the face so couldn't add any full face photo. If you want to do this look, try to keep your lips nude.


Hope you like it!

Love and respect,
Eeshita.